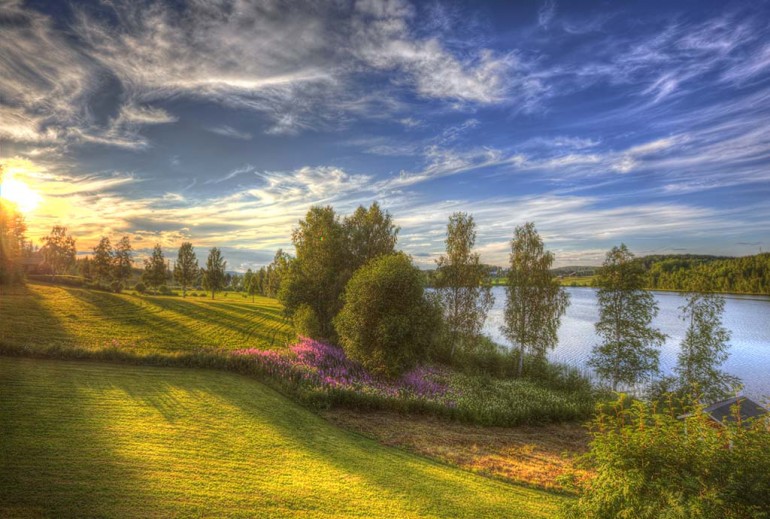
It has never been easier to take beautiful HDR-images than now. We explain what it is, how you can create real HDR-images and how to cheat and create nice HDR effects from one single exposure.
HDR (High Dynamic Range) is a technique to create images that is closer reality, how the human eye perceives a view. Our cameras have a limit to the luminance range it can render. The dynamic range is shorter.
We have all taken images of sunsets, where the sky is white and the rest black. That’s a perfect case for HDR photography. Another good use for HDR photography is when shooting interiors and you want the outside view through a window to be correctly exposed.
The analogue way to solve this is by taking to exposures, one for the window and one for the interior and then combines the two into one image.
It’s easier now than ever to create beautiful HDR images with today’s digital cameras. We will describe a few ways to do this, but first a little something about the HDR features in you camera and your phone.
Using bracketing in you camera and the HDR function in your iPhone

Use the Bracketing function in your camera.
Your iPhone have a HDR button and when pressed it will take two exposures and combine into one image without any further manhandle for the user.
Most DSLR cameras also have a bracketing (AEB) function, where you can set the deviation in +/- f-stops. Sometimes the camera will then automatically take three exposures and sometimes you’ll have to press the button yourself. You’ll then produce three images, one normal exposure, one under and one over exposed.
- Put the camera on for example +/- 2 f-stops difference.
- Mount the camera (preferably) on a tripod and aim it to the motive. It is possible to take HDR images by freehand, but a tripod is preferred. If you have moving objects in the motive however, you may want to consider another method.
- If you use the automatic mode you need to make sure you expose by the midtones and not for instance the sky.
- Take three images as quickly as possible
- For longest possible depth of focus use as high aperture setting as possible
- Make sure the camera is levelled.
-
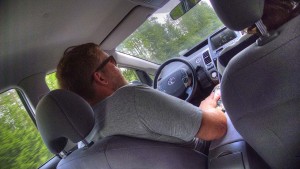
Taken on freehand on a bumpy road. Merged in Photomatix.
If you are not using the bracketing function you should set the camera to manual. Manual settings might be a good idea anyway. Measure the value of the sky and the darkest parts with spot metering and set the normal exposure to the middle. You may also like to use the palm of your hand if you don’t have a grey card.
- Make sure your sensor end lens is clean. The slightest problem will multiply with three when you merge the pictures.

1. The software for true HDR
The programs we looked at for this article are Photomatix and Luminance HDR. Both programs are available for Windows and Mac and the latter is also available for Linux. Photomatix is also available as plug-ins for Adobe Photoshop and Lightroom.
Photographers will definitely prefer Photomatix. It is much easier to work with and to adjust and get the wanted results. We definitely recommend Photomatix, even though it costs around 100 USD and Luminance is free.

Photomatix is the best HDR software on the market.
Photomatix is easy to use, fun to work with, stable, and the results we got was outstanding.
You can get a trial version of Photomatix that later can be licensed here.
Get the latest version of Luminance her.
2. Merge images with your image editor
Photoshop have a fuction called Merge to HDR Pro. In the latest version you’ll find it under File Automation, in earlier versions in File Script. With this plug-in you can easily merge the images and adjust different settings to achieve the best result.
It is also possible to expose images after the different image sections and merge them into one by mounting them in different layers in Photoshop and then carefully paint the layers to achieve the result you want. The advantage of this method is that you can get moving objects sharp, like a person or a bird in the motive. This method is however more difficult and takes much more time.

Luninance is free, but not at all fun to work with.
3. Shoot in raw format and adjust the luminance in white, highlights, shadows and black
Camera Raw comes with Photoshop and Lightroom have excellent possibilities for those of us who likes to cheat and get HDR effects from one single exposure. Simply adjust the luminance in white, highlights, shadows and black. You can also adjust brilliance and colour temperature and more. In addition there is a curves function, where you can set the range for each light and adjust even more.
Don’t miss our article on raw editing, where we have an example as a slide show.
4. Apps and filters to achieve HDR effects.

Google Picasa is nice, if you want to make HDR effects from one single exposure.
If you are using an iPhone there is the built in function for HDR but there are also a wide range of apps ranging from free to rather expensive that can be used to both take HDR images and to edit single images in order to get HDR effects. We will look into these soon. There are also many web services with similar functions. The most known is of course Instagram, which have an HDR-button. Google Picasa also have excellent image editing function.